How to Verify Account in ApolloX
By
ApolloX Exchange
2013
0

- Language
-
العربيّة
-
简体中文
-
हिन्दी
-
Indonesia
-
Melayu
-
فارسی
-
اردو
-
বাংলা
-
ไทย
-
Tiếng Việt
-
Русский
-
한국어
-
日本語
-
Español
-
Português
-
Italiano
-
Français
-
Deutsch
-
Türkçe
How to Enable Google Authentication【PC】
1. After login, select [Security]-[Google Authentication] and click the [On] button.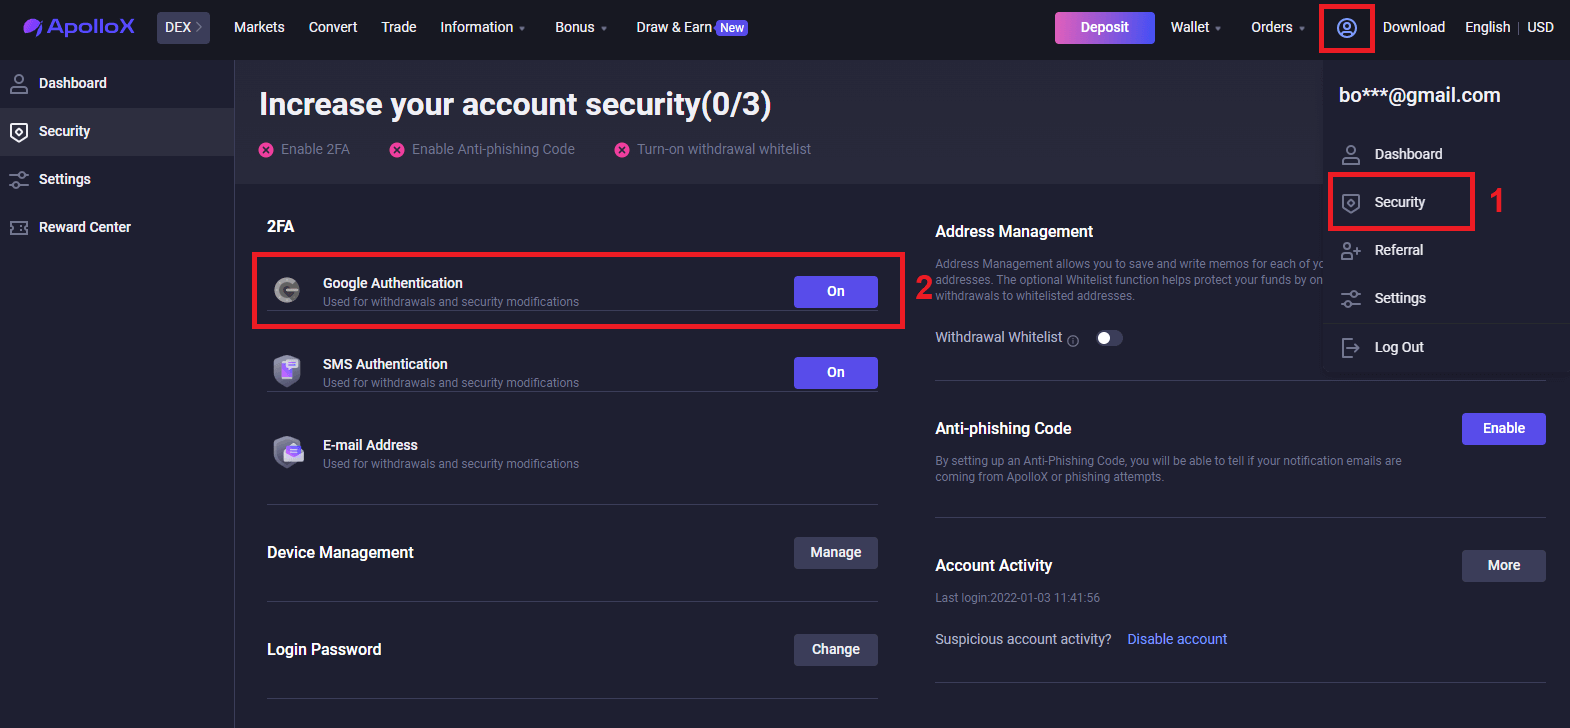
2. Follow the step-by-step instructions and proceed.
Download App

Scan QR code
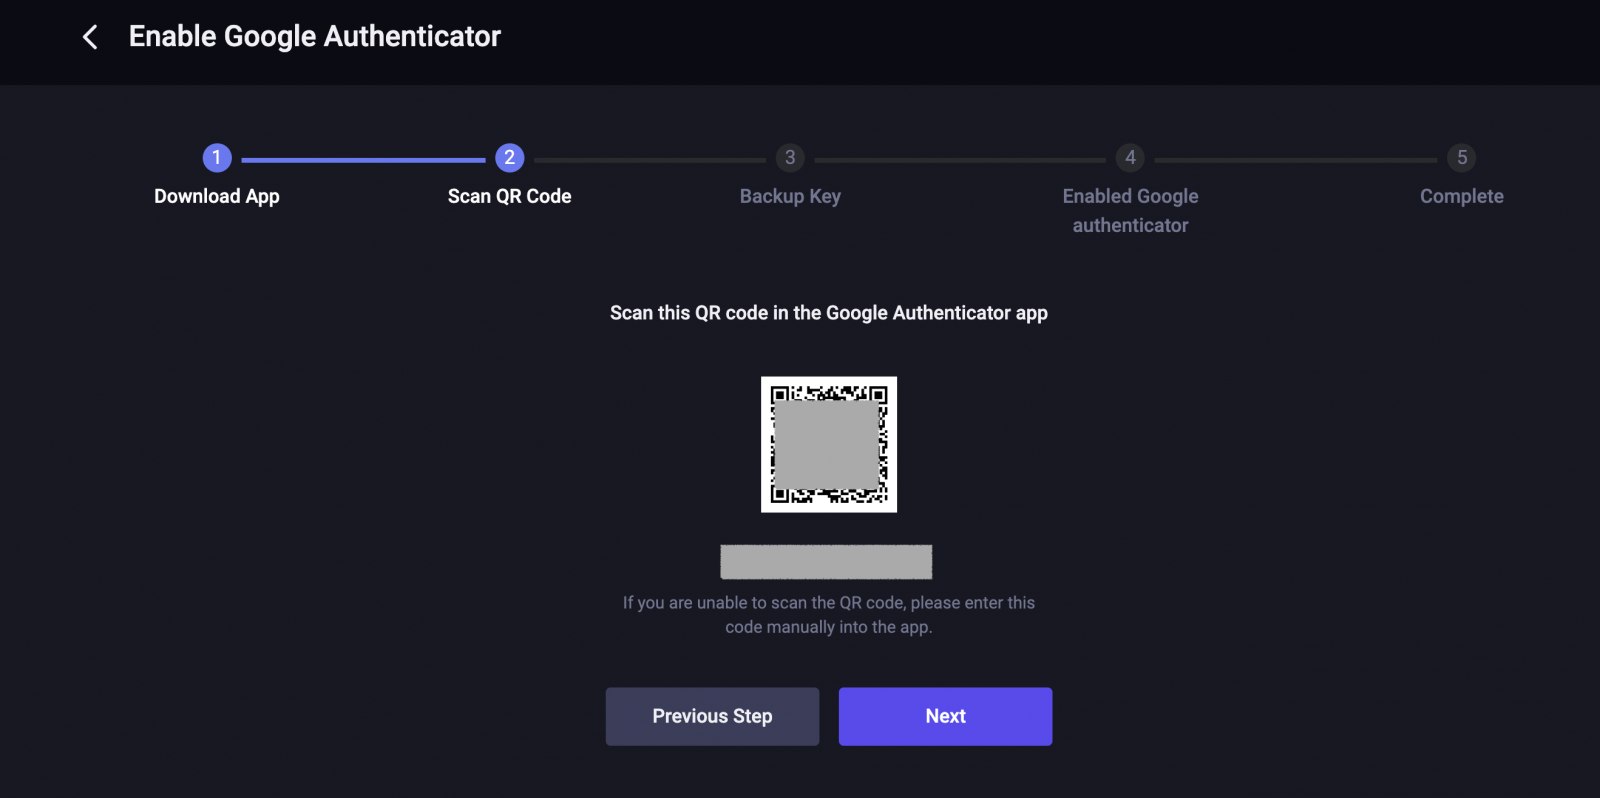
Backup Key

Enabled Google authenticator
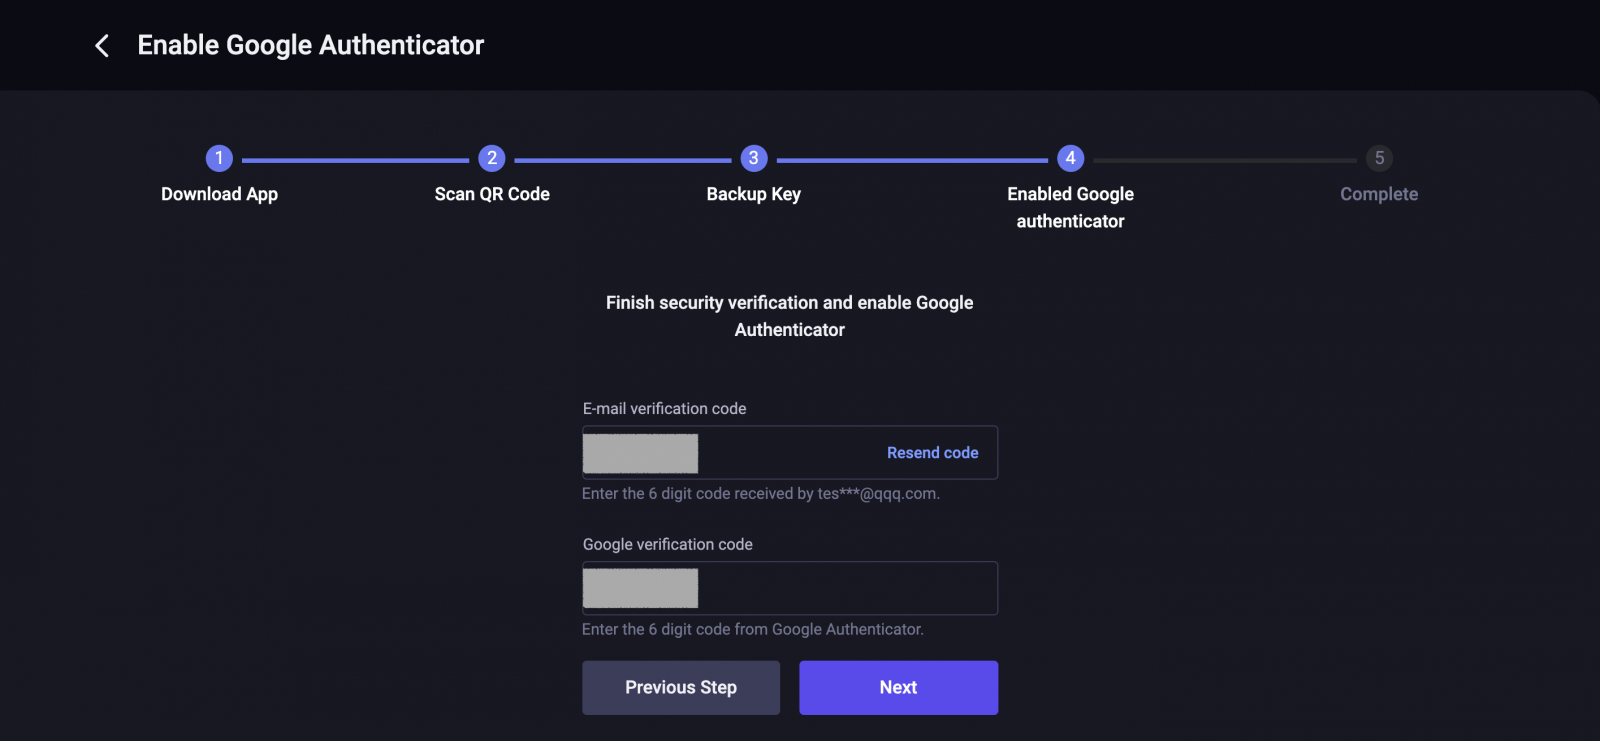
Completed.
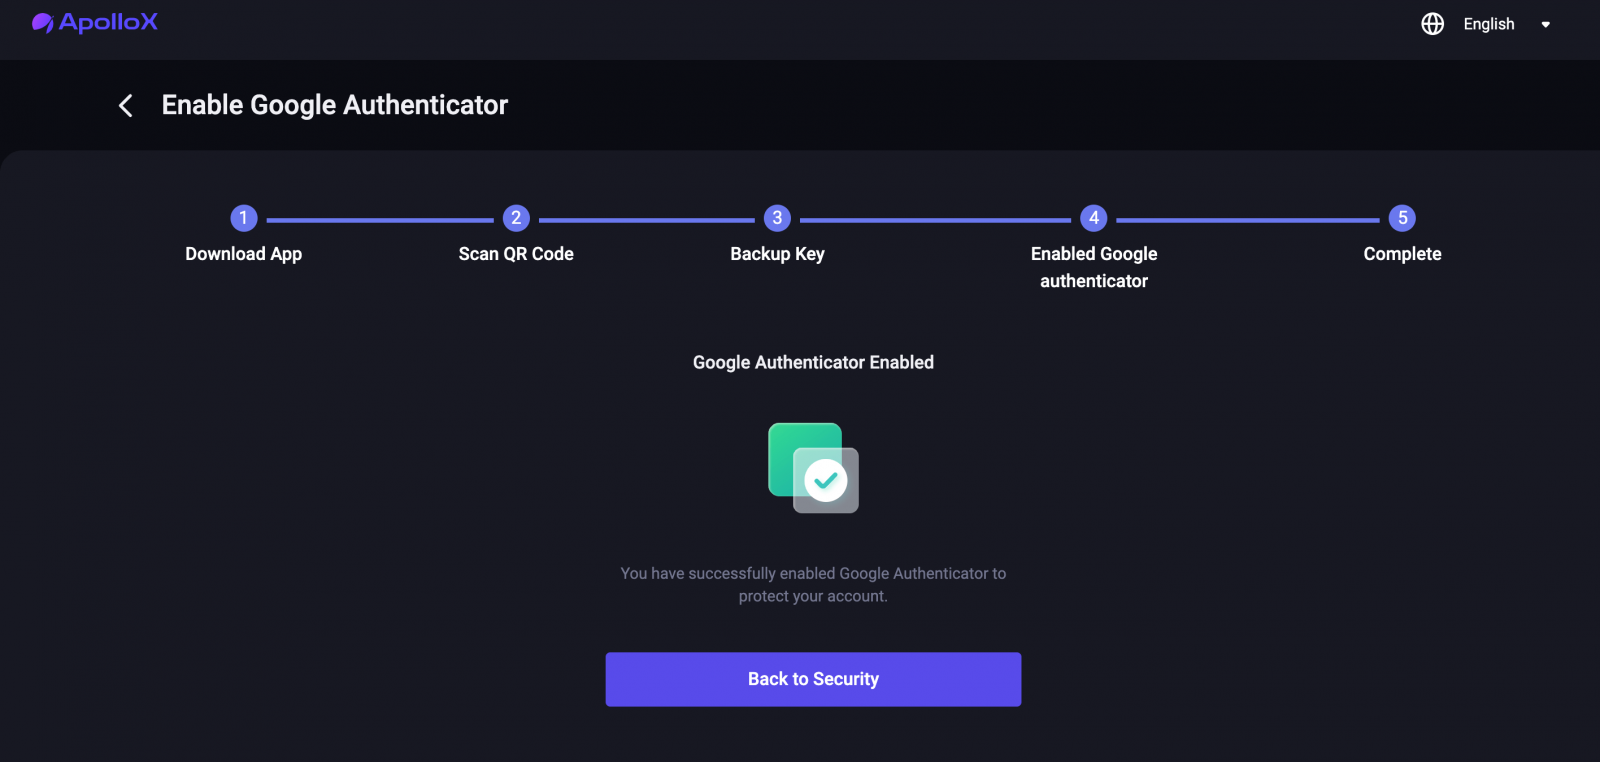
How to Enable Google Authentication【APP】
1. Login to ApolloX account, click on the "dashboard" icon.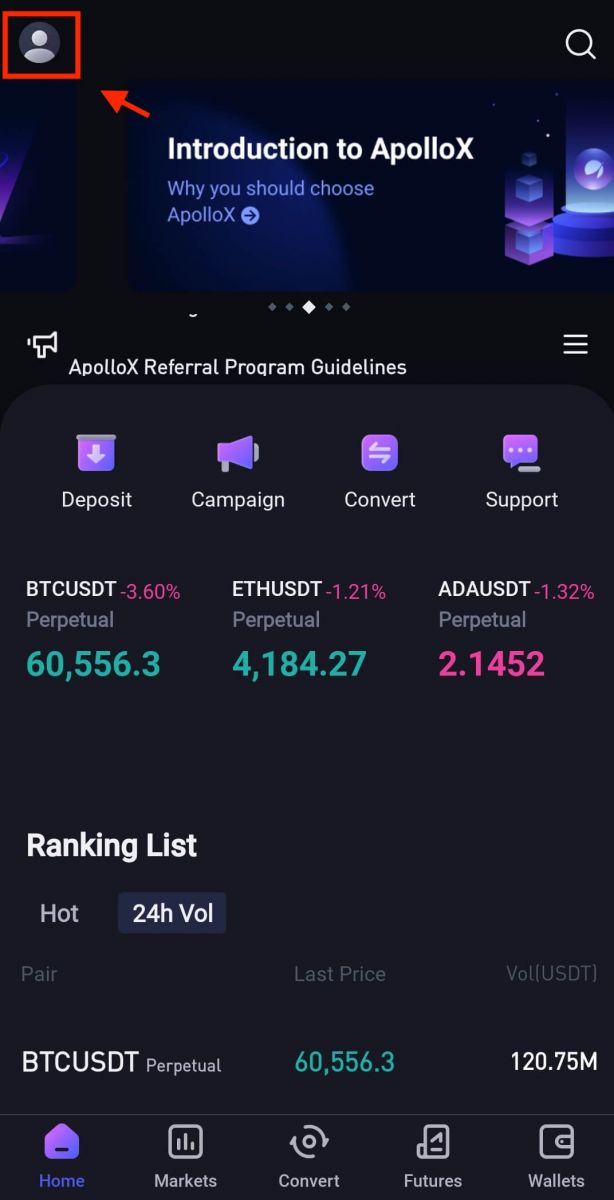
2. Select [Security]-[Google Authenticator].
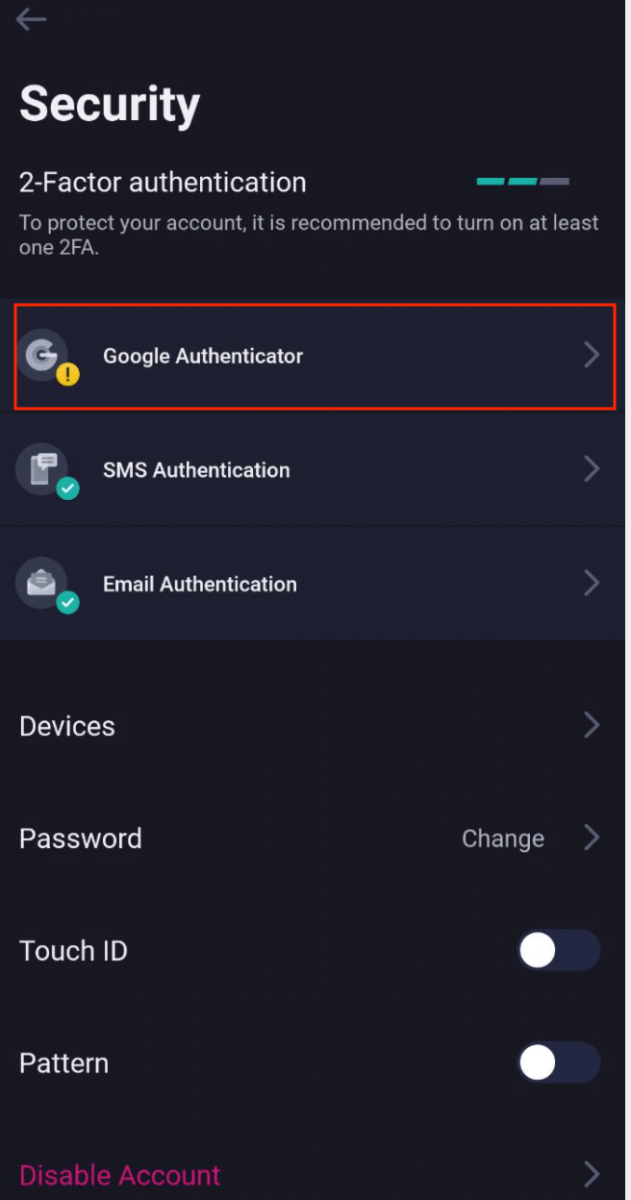
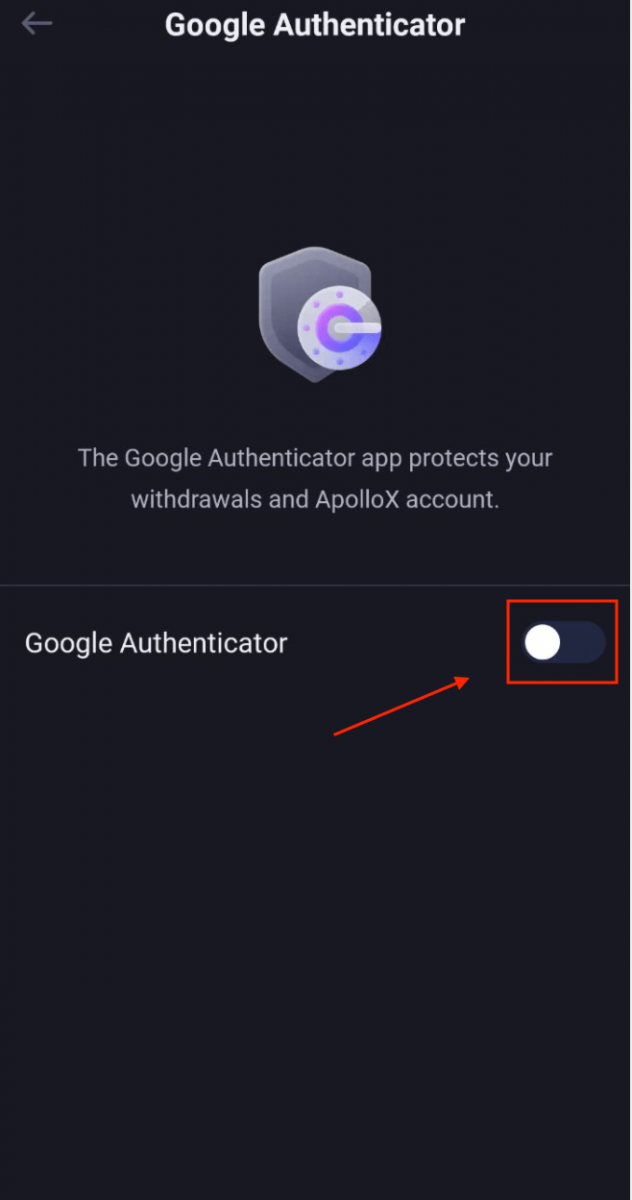
3. As picture below, click on the button to proceed to set up a new Google Authenticator.
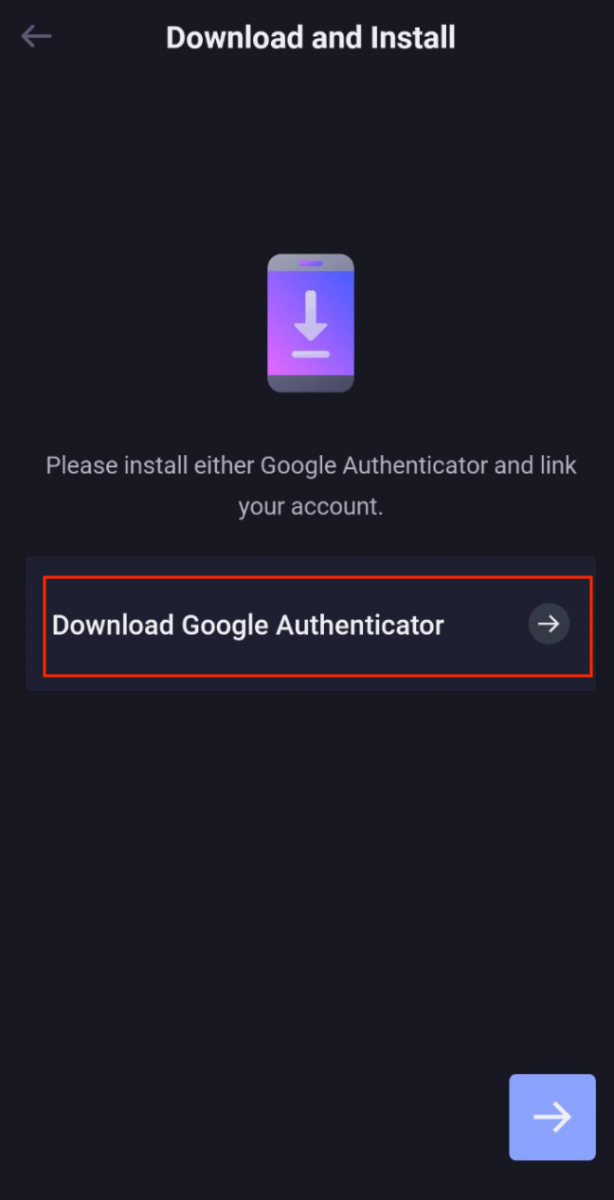
4. Download Google Authenticator on your phone if you do not have one or click "next" icon.
5. Follow the instructions, copy your backup key and fill in the security verification code as requested to complete set up of the new Google Authenticator.
6. Completed.
ApolloX Anti-Phishing Code
What is an Anti-Phishing Code?
An anti-phishing code is a string of characters you can set to help identify phishing attempts from fake ApolloX websites or emails. Once you set up your anti-phishing code, it will be included in every email from ApolloX.ApolloX recommends that you change your Anti-Phishing Code regularly to enhance the security of your account.
Enable your Anti-Phishing Code
1. Log in to the official ApolloX website, then click on the "Dashboard" icon and select [Security].
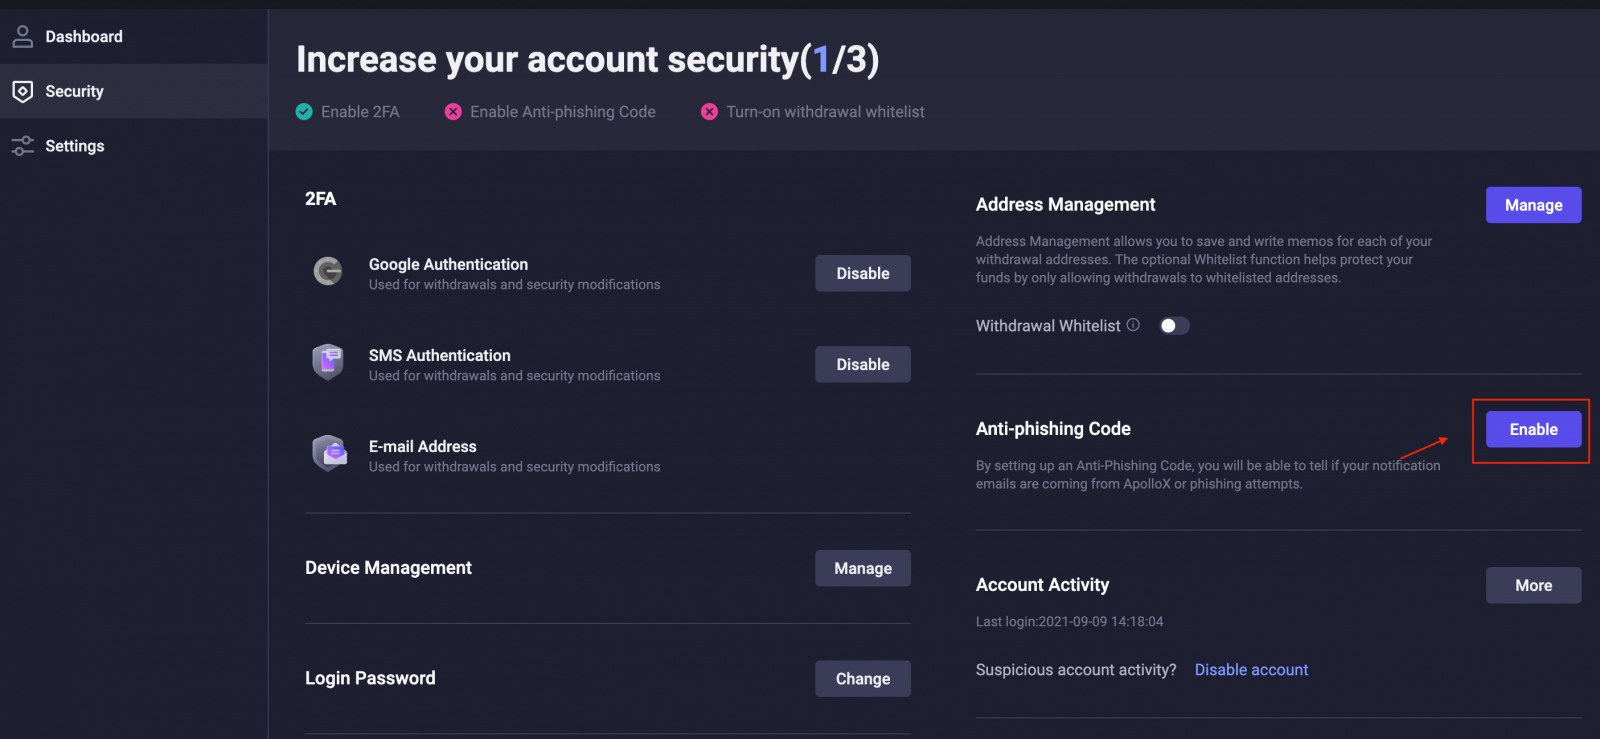
2. Go to the "Anti-Phishing Code" section on the "Security" page and click [Enable].
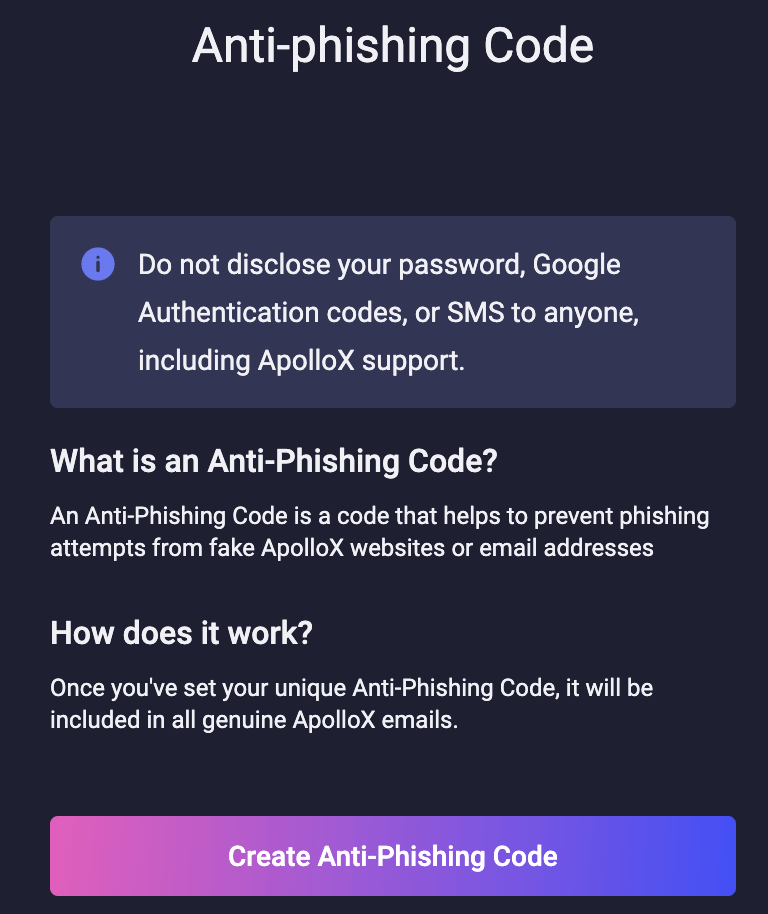
3. Click [Create Anti-Phishing Code].
4. Enter the anti-phishing code you want to set and click [Submit].

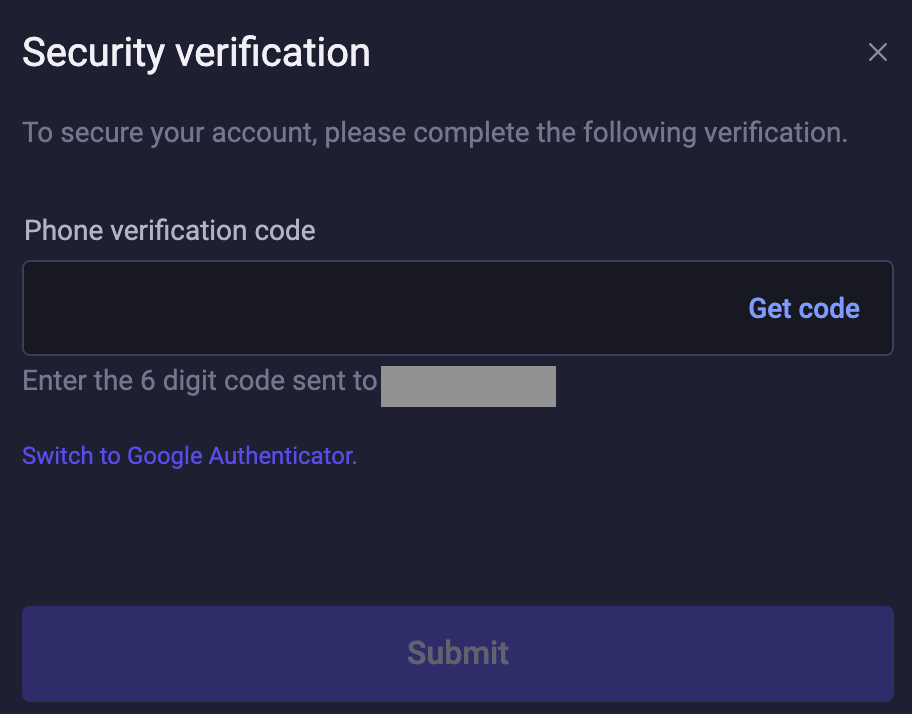
5. Complete security verification.
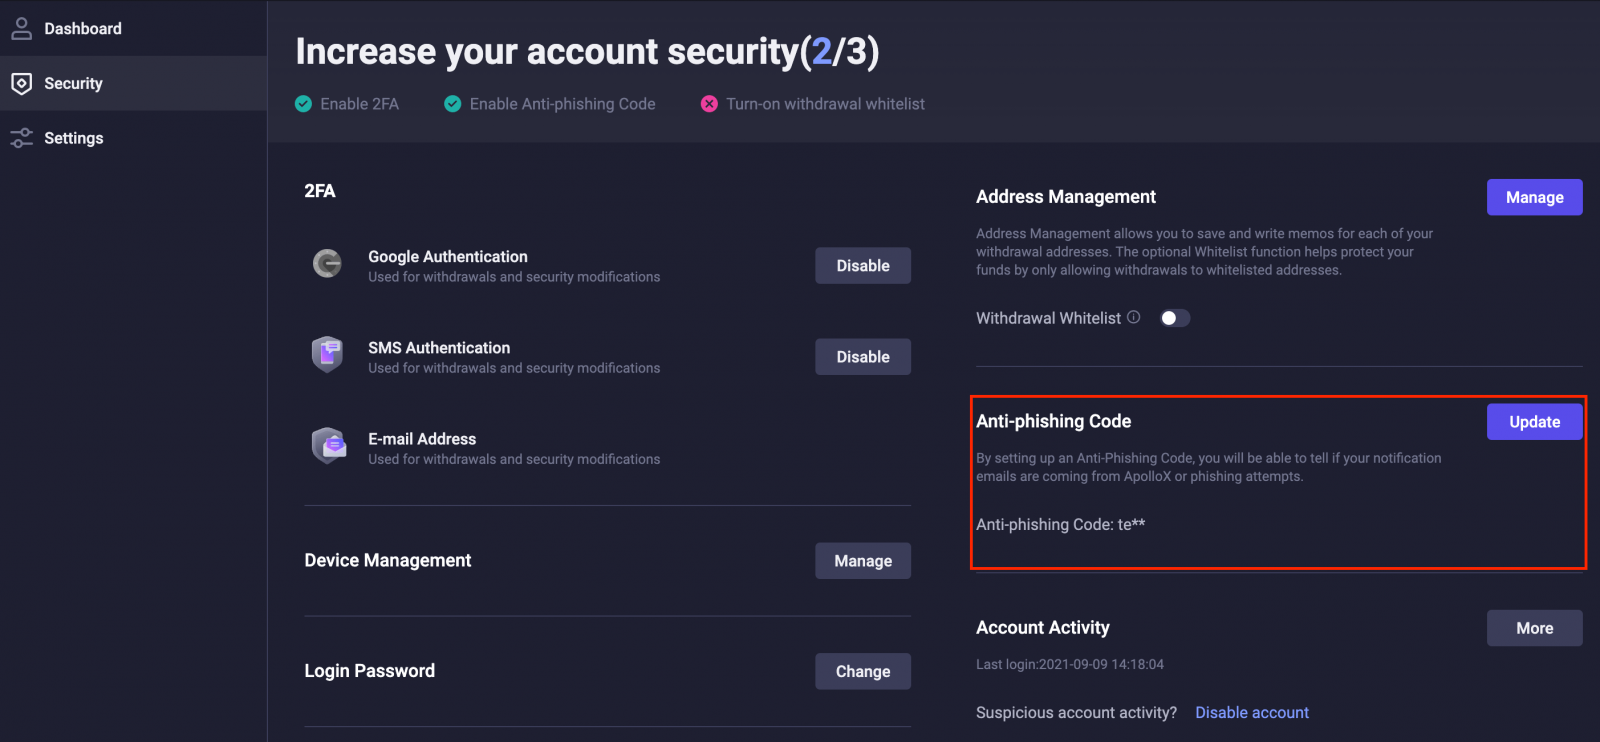
6. Once you complete security verification, you can go back to the "Security" page to see your updated information.
Update Your Anti-Phishing Code
ApolloX recommends that you change your Anti-Phishing Code regularly to enhance the security of your account.1. Log in to the official ApolloX website, then click on the "Dashboard" icon and select [Security].

2. Go to the "Anti-Phishing Code" section on the "Security" page and click [Update].
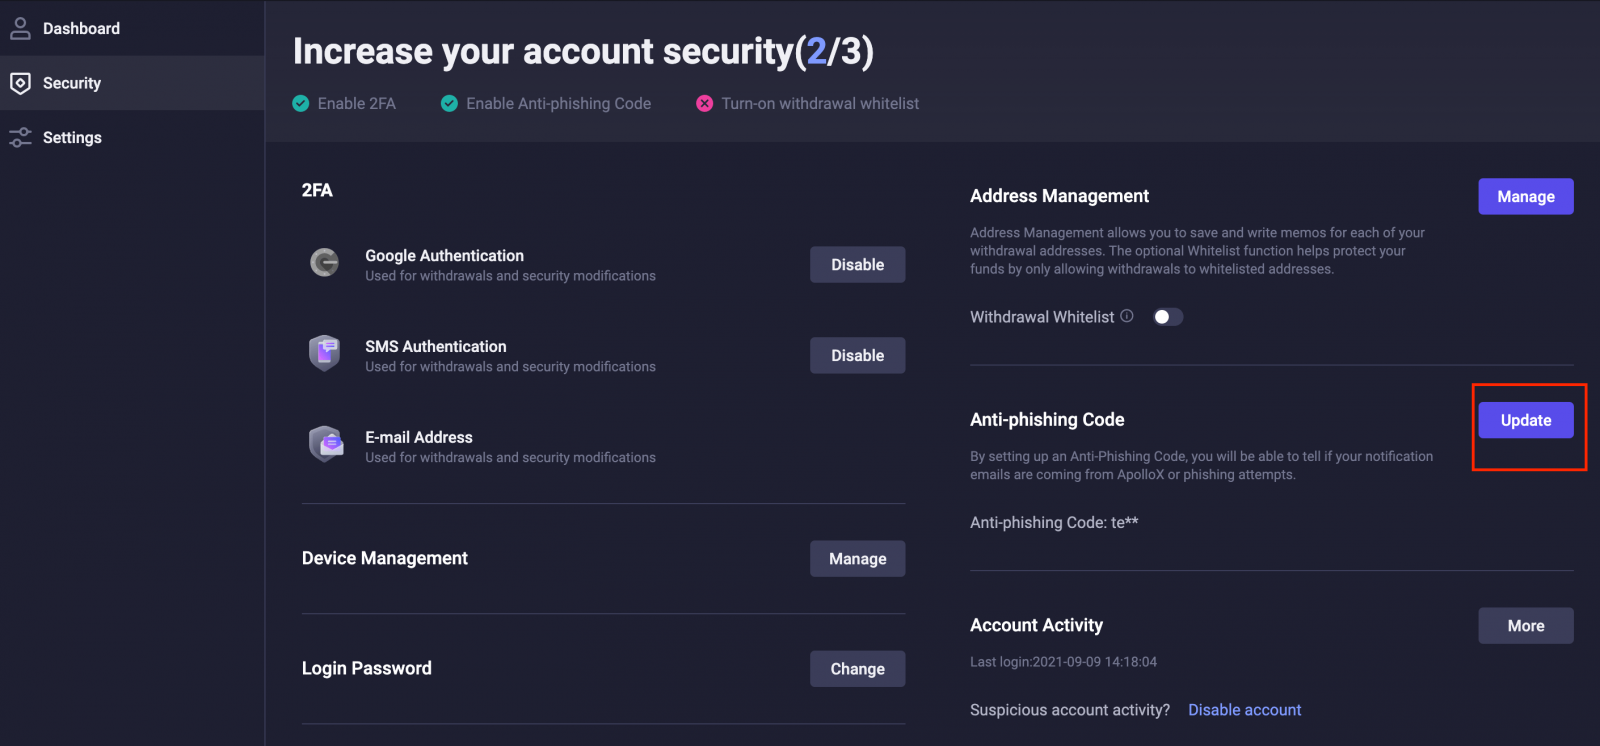
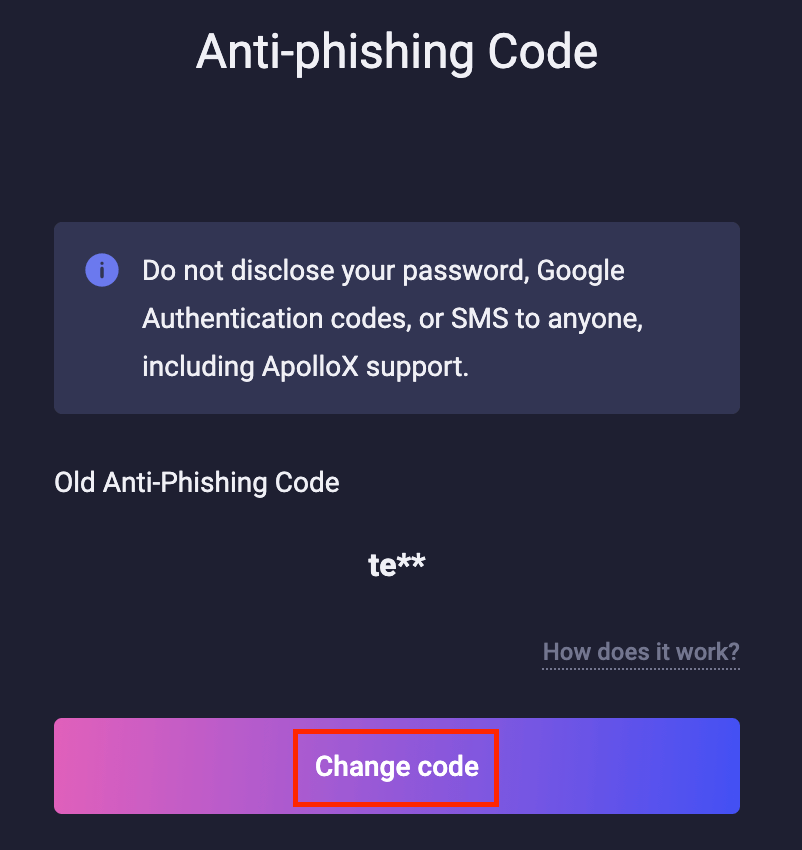
3. Click [Change Code].
4. Enter your new Anti-Phishing Code and click [Confirm Changes].
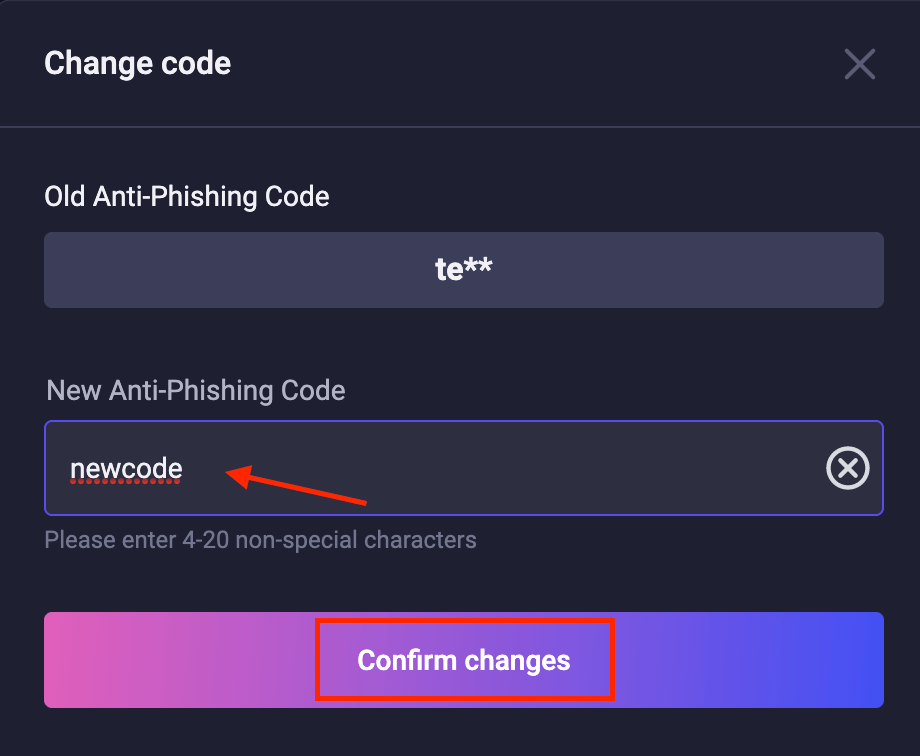
5. The update will take effect once you complete security verification.
- Language
-
العربيّة
-
简体中文
-
हिन्दी
-
Indonesia
-
Melayu
-
فارسی
-
اردو
-
বাংলা
-
ไทย
-
Tiếng Việt
-
Русский
-
한국어
-
日本語
-
Español
-
Português
-
Italiano
-
Français
-
Deutsch
-
Türkçe
Tags
apollox verify identity
apollox verify account
apollox verify identity email
apollox verify address
apollox verify account email
apollox verify your account
verify on apollox
apollox verify phone number
apollox verify payment method
apollox verify my account
apollox verify my id
apollox verify personal information
apollox verify document
verify your apollox profile
verify your apollox identity
verify profile in apollox
verify my apollox account
verify apollox profile
apollox verification account
verification apollox account
apollox verification
verification in apollox
kyc apollox account
apollox verify account
apollox account verification
apollox id verification
apollox address verification
verify my identity on apollox
apollox kyc verification


